Walkthrough: Guide to Navigating The New Menu In UtilizeCore
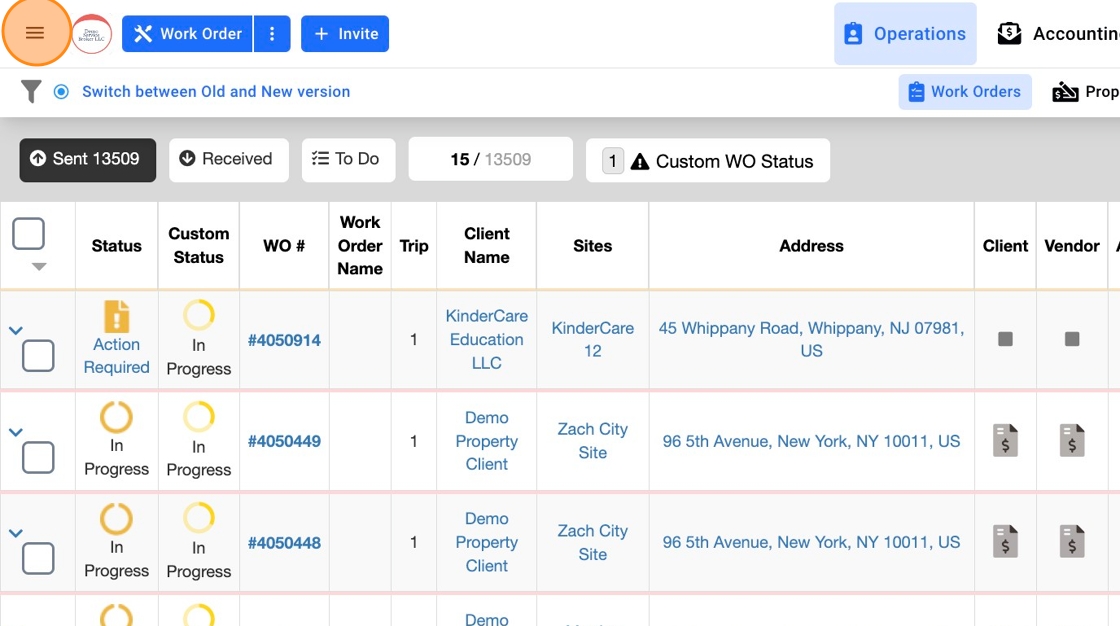
1. You can click on the invite button on the home page to invite a new Site, Client, Vendor and a Team Member instantly.

2. You can click on the three dots next to the Work Order button to view more options

3. Click "Invoices"

4. This will allow you to enter both Client and Vendor Invoices instantly. Click back on the Invoice to go back to the main menu

5. Click "Proposals"

6. This will allow you to enter both Client and Vendor Proposals instantly. Click back on the Proposals to go back to the main menu

7. Click Services

8. This will allow you to enter Trade, Service, Tasks and different Rate Types. Click back on the Services to go back to the main menu

9. Click "More"

10. This will show you a list of options to enter a new PO, Scheduled Service, Role etc...

11. Click back on the three dots to close the menu dropdown

12. Click on the Work Order button to enter a new Work Order

13. Click on the three lines on the top left corner to view more menu options

14. Click "Settings" to view Workflow/Settings page

15. Click "App Store" to view all your third part integrations applications

16. Click "Billing" to view your subscription and billing type

17. Click Explore to view all your POs, Proposals and Invoices

18. In the bottom left corner, you can change from light to dark theme

19. Click back on the same button to switch to the light theme

20. You can click on the three lines to close the side menu

