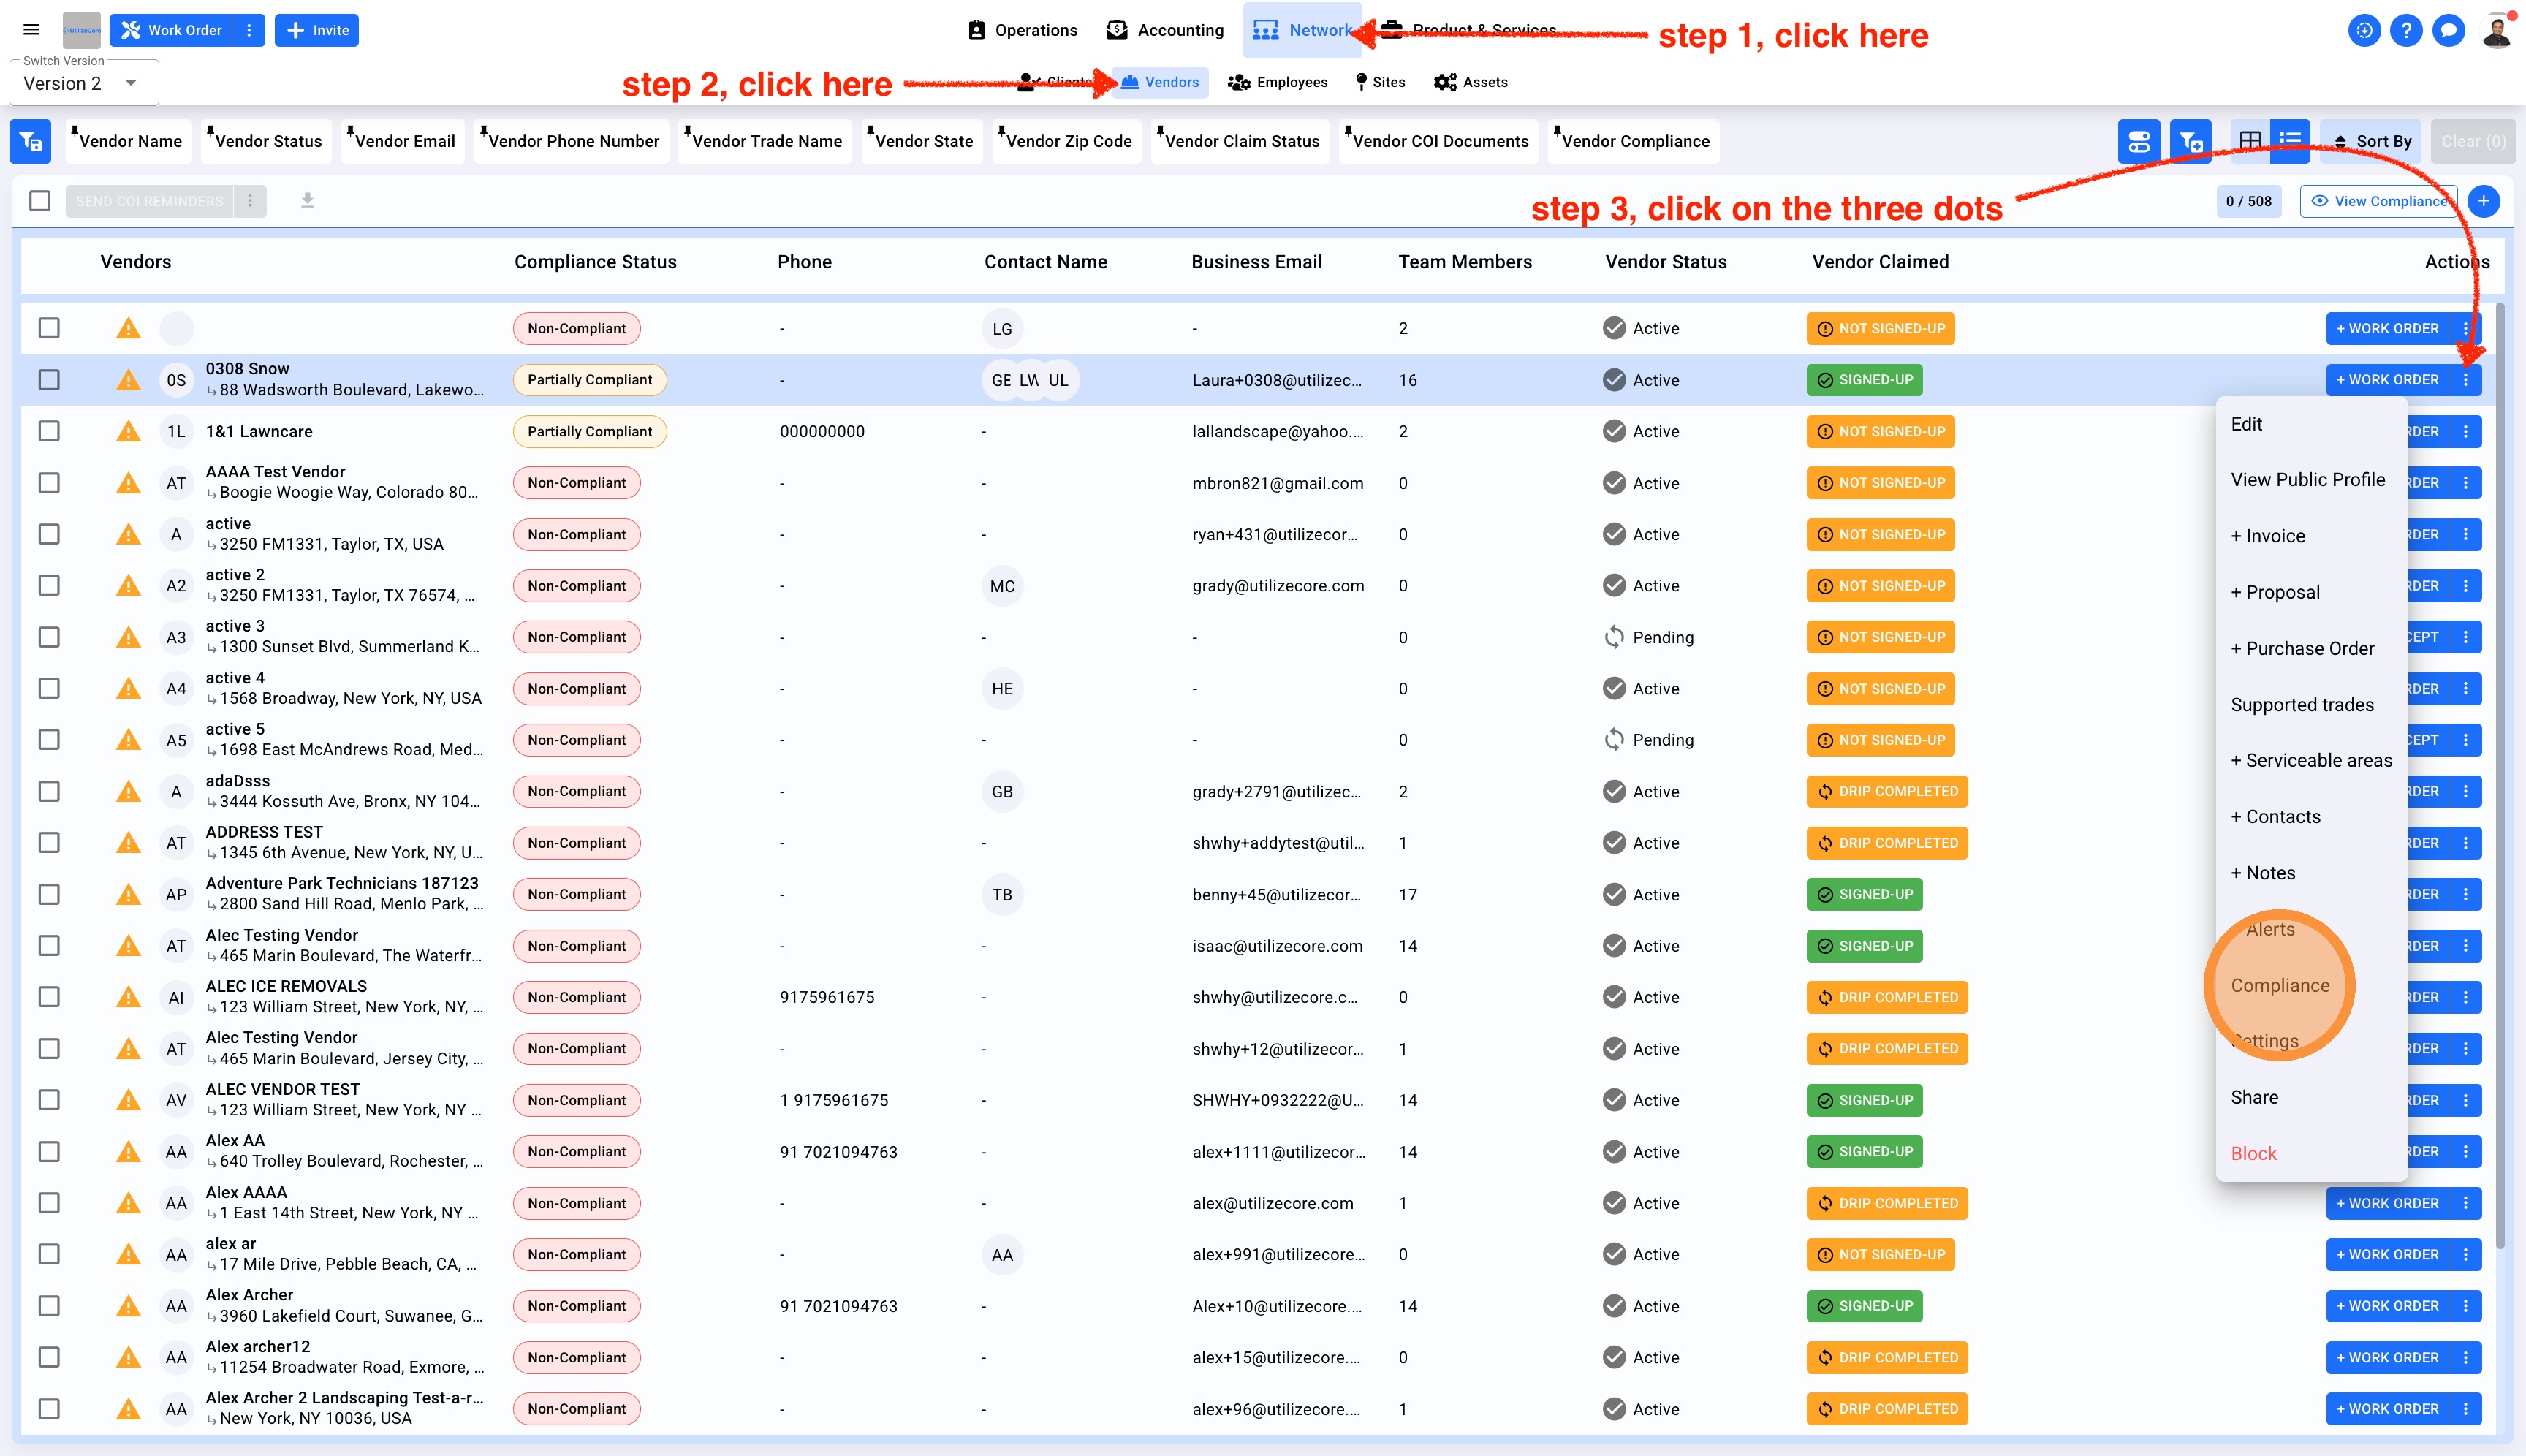
1. Click Network, select Vendors from the sub-menu. Make sure to switch to Version 2 by clicking on the versions in the top left corner. Click on the more (three dots) button for the Vendor profile and select Compliance
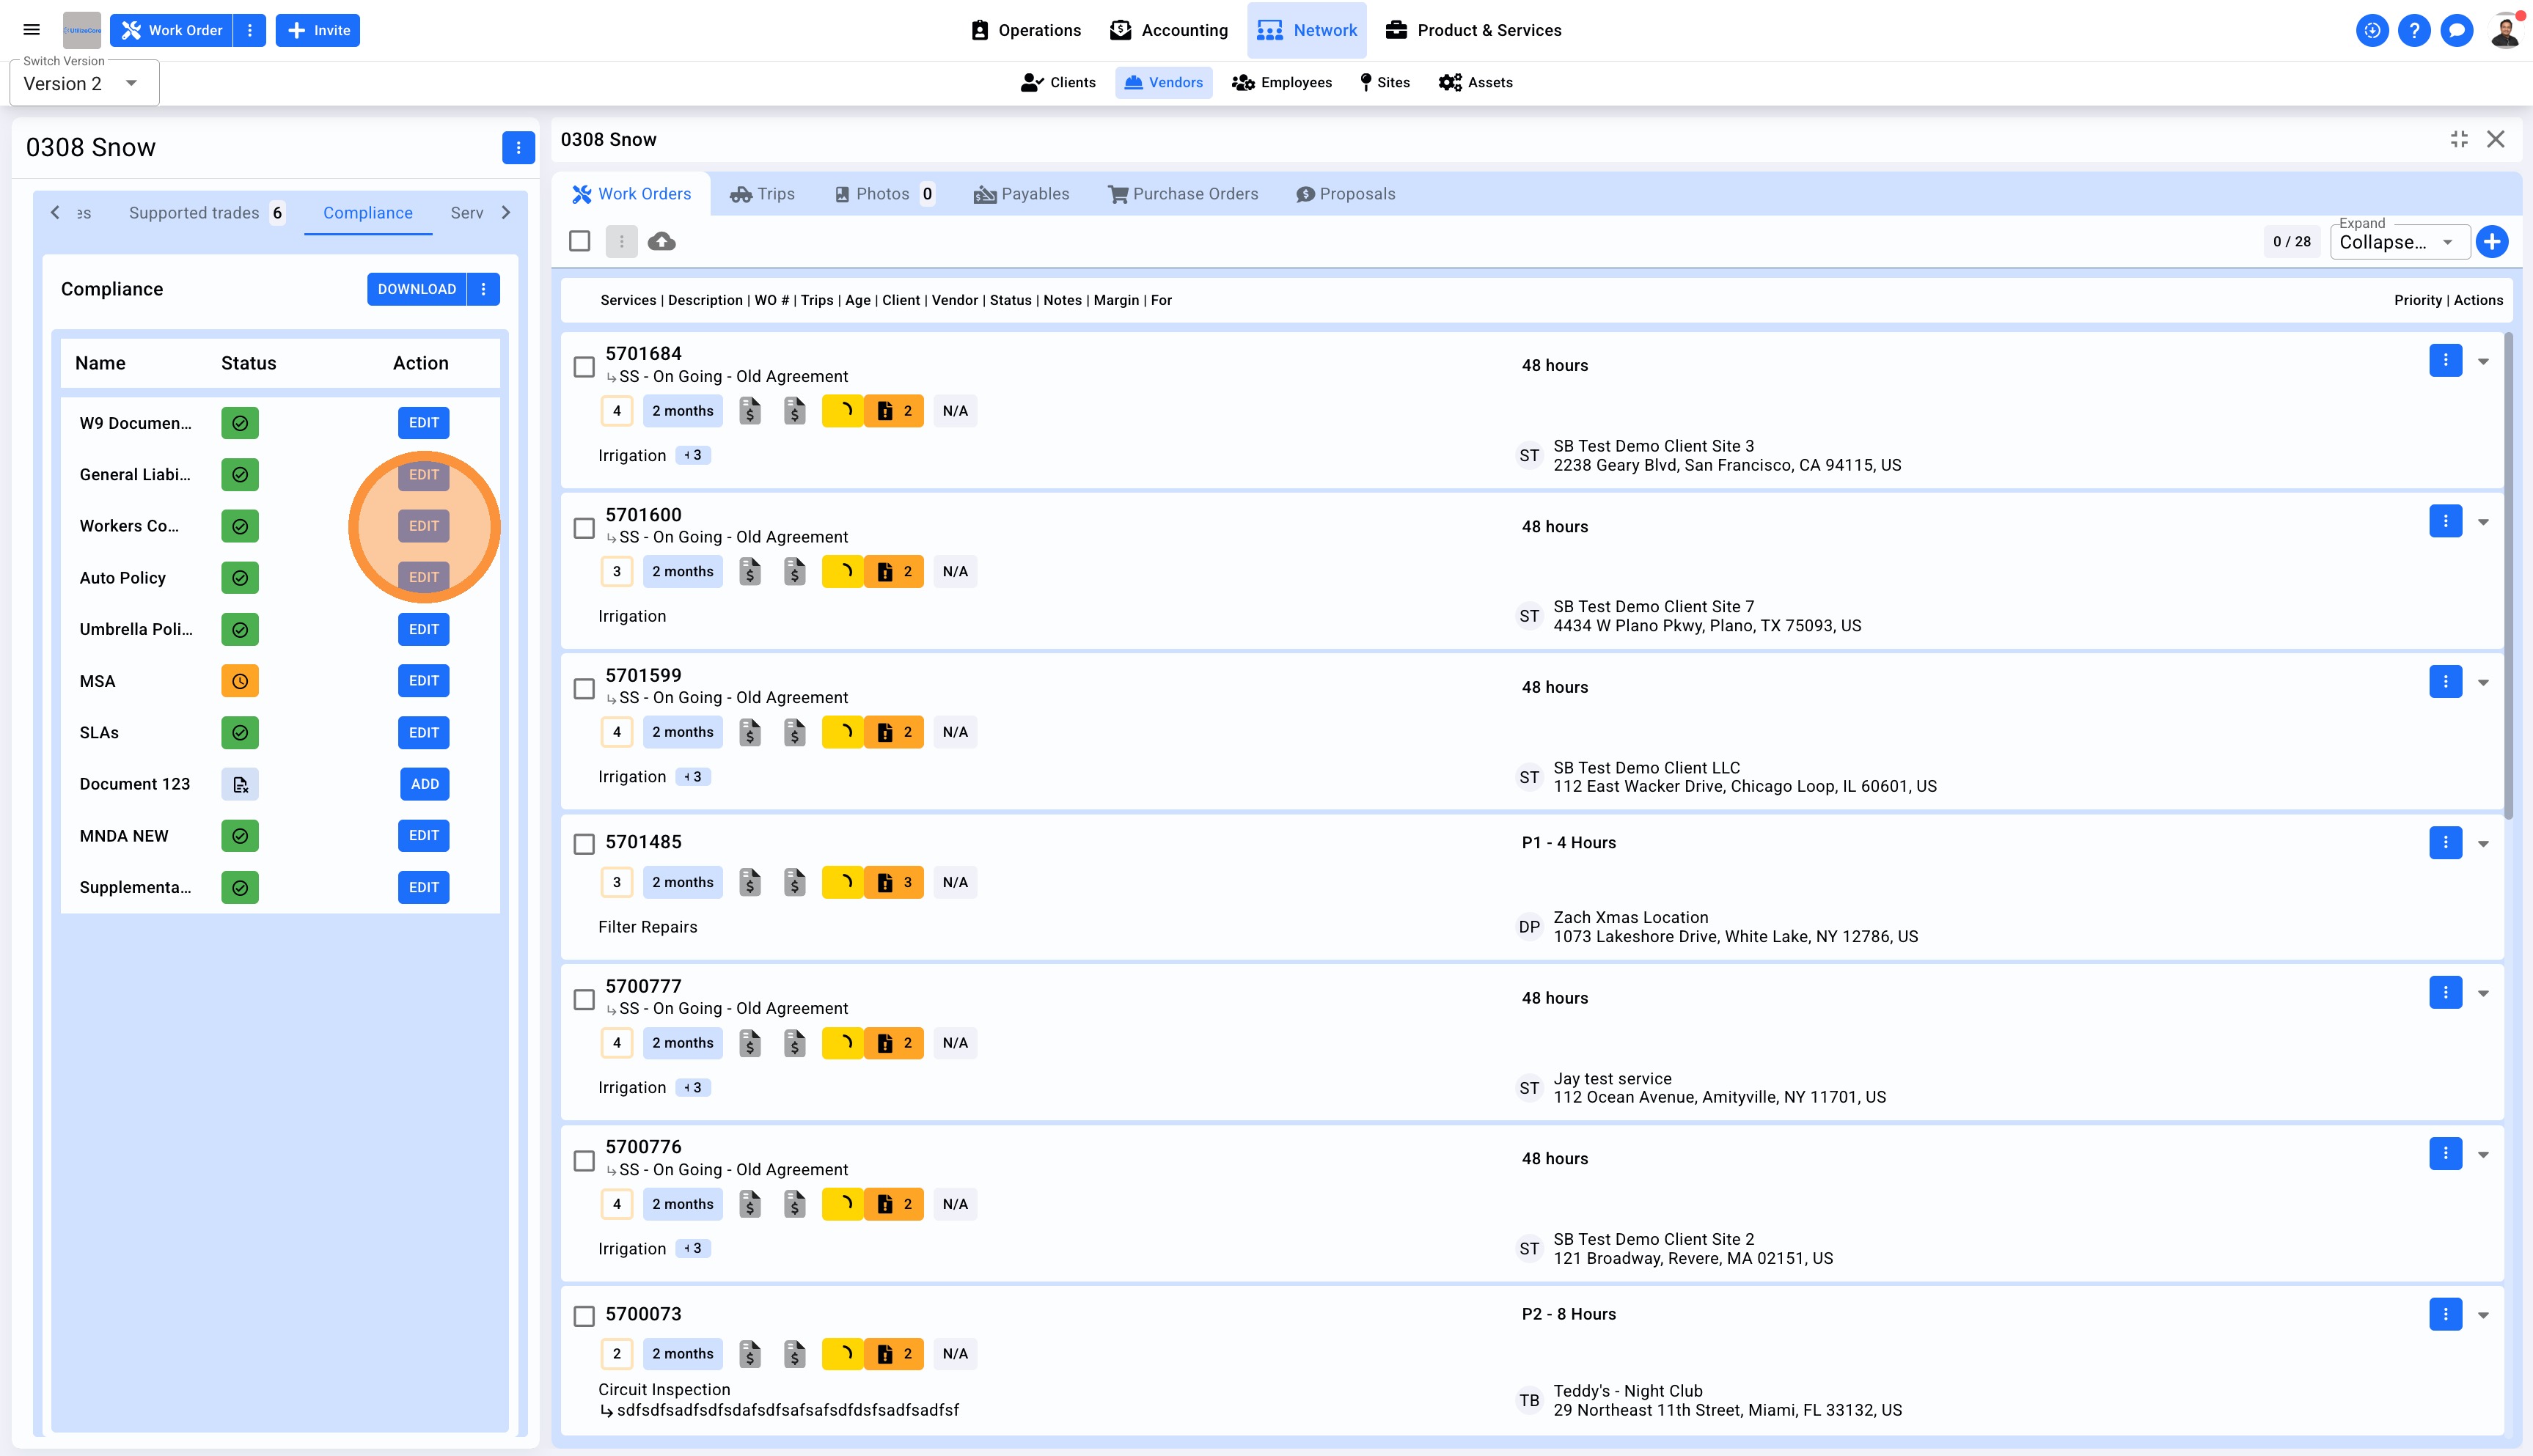
2. Click on the Edit button in the left panel to change or add Vendor Compliance document
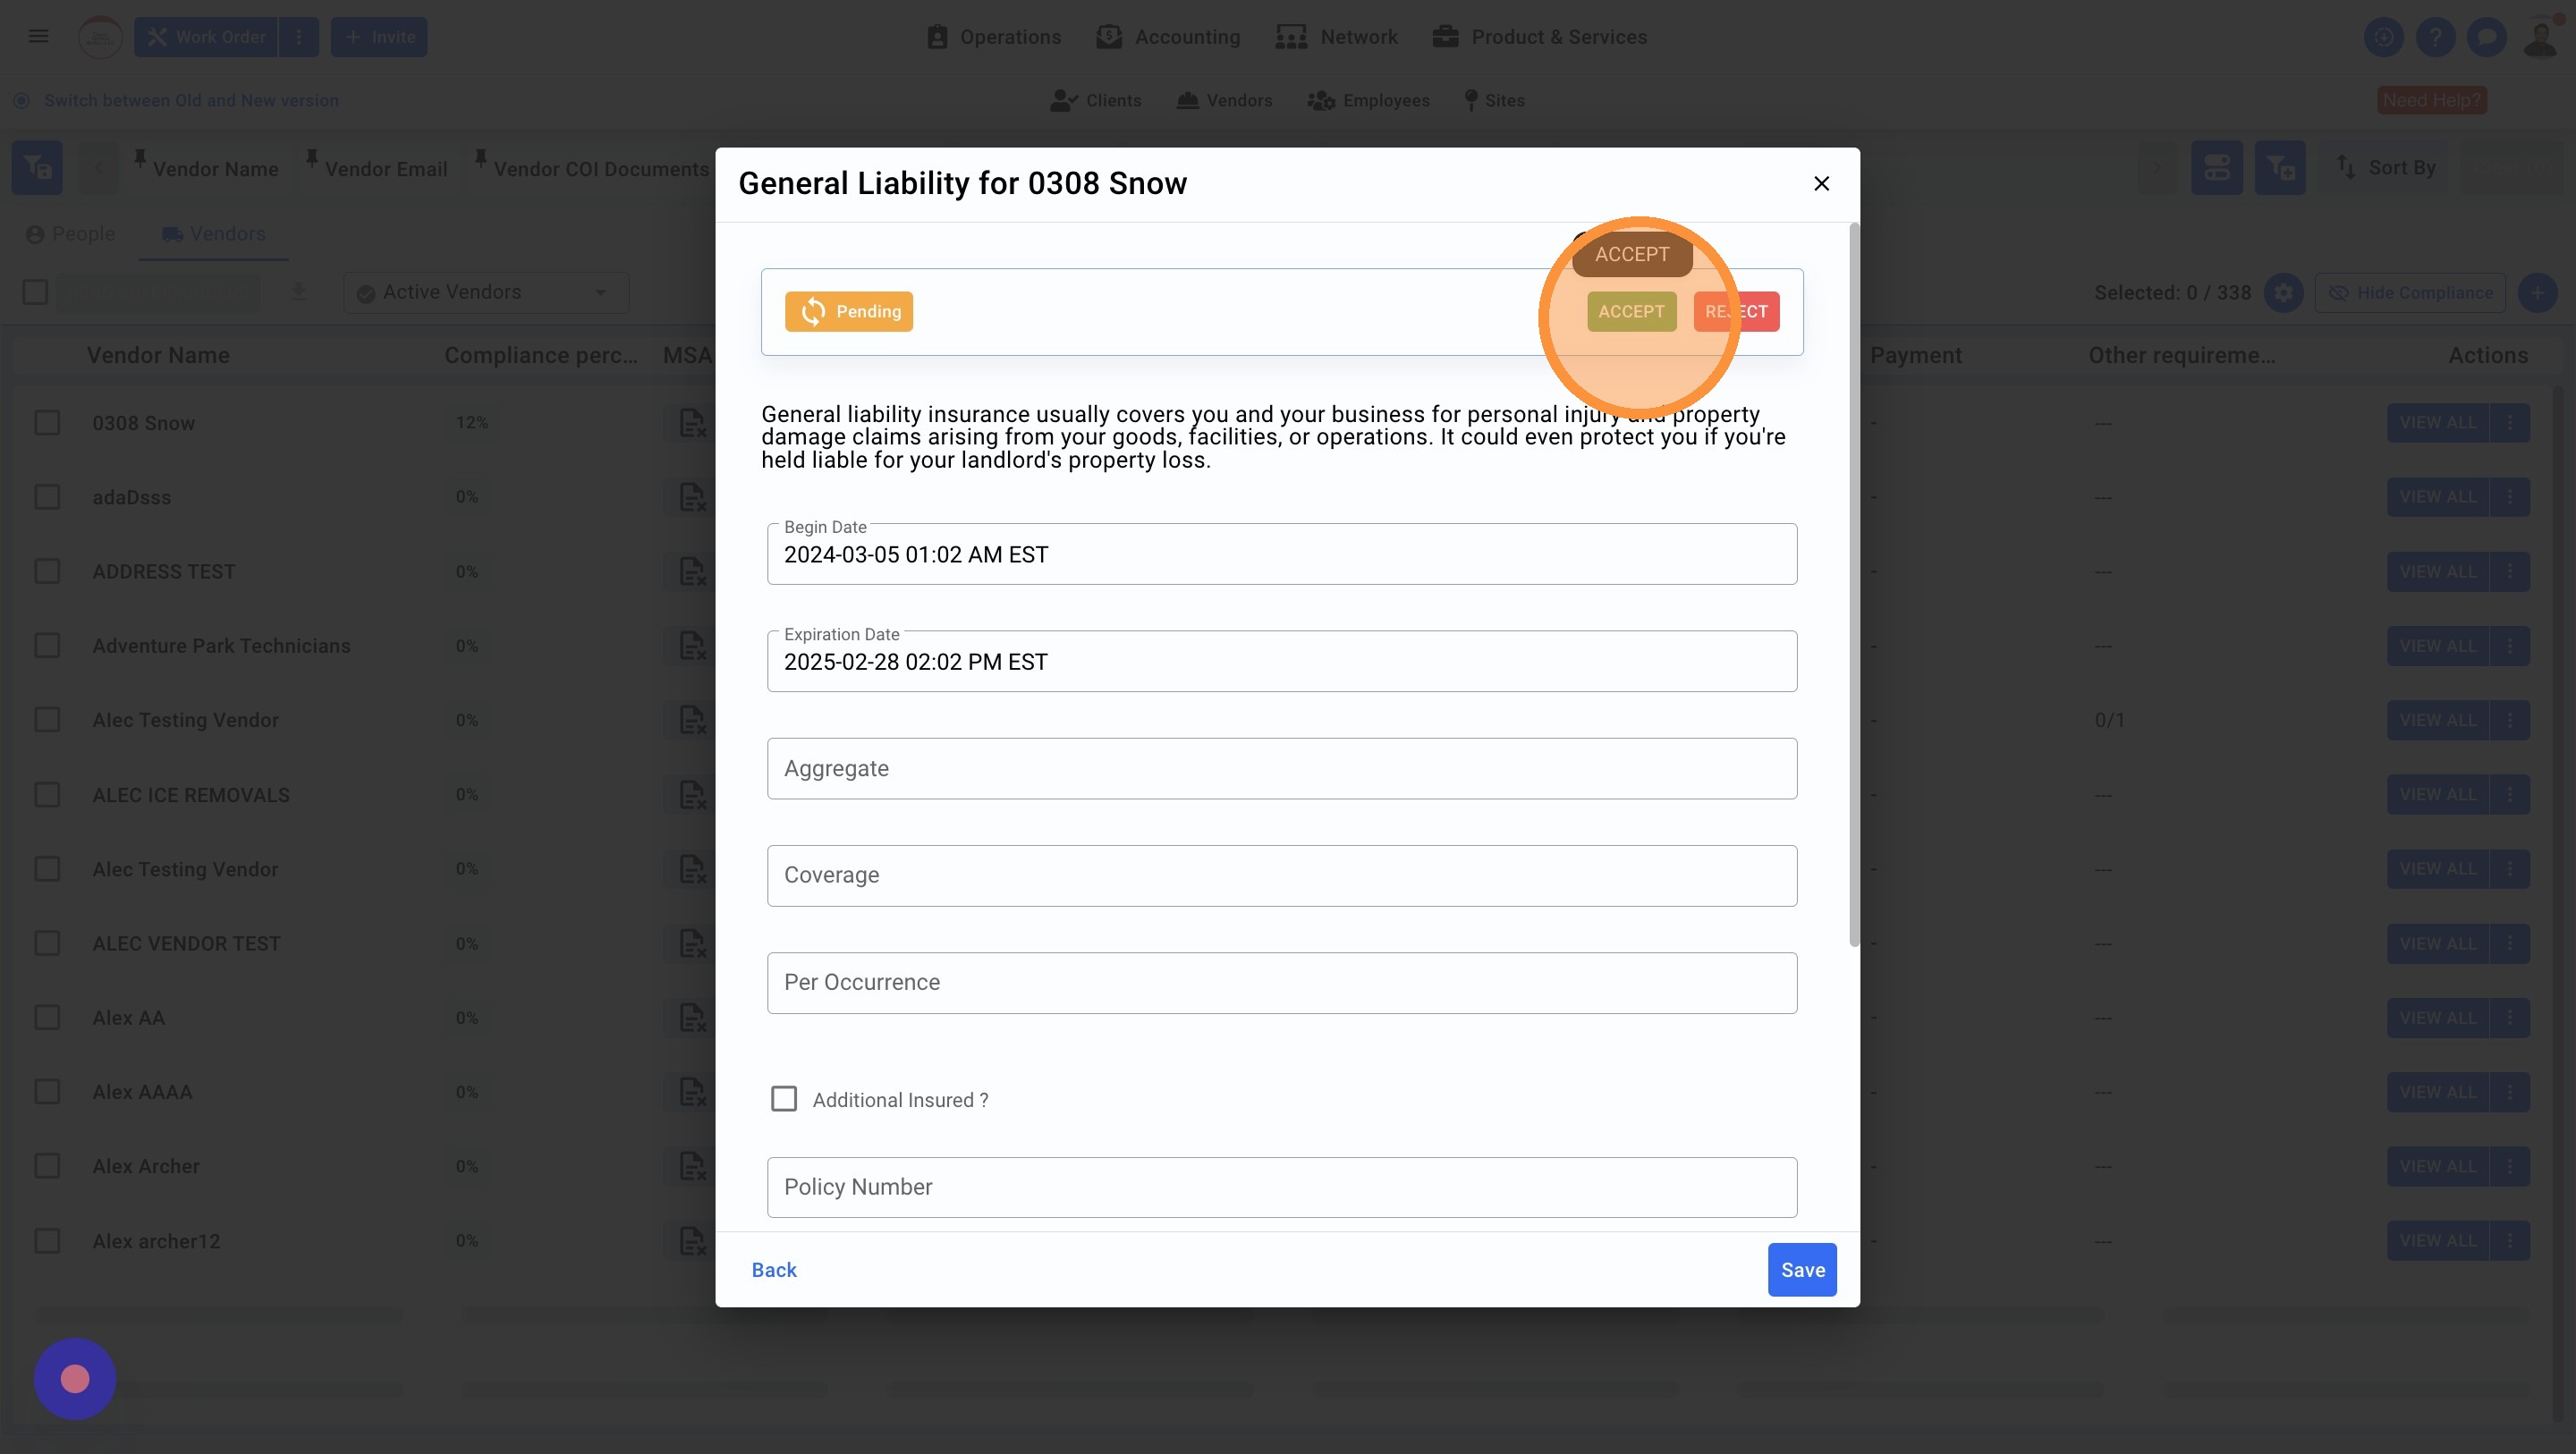
3. After adding the document, click "ACCEPT" to accept the document. If you leave this as is, it'll show the document status as Pending Approval
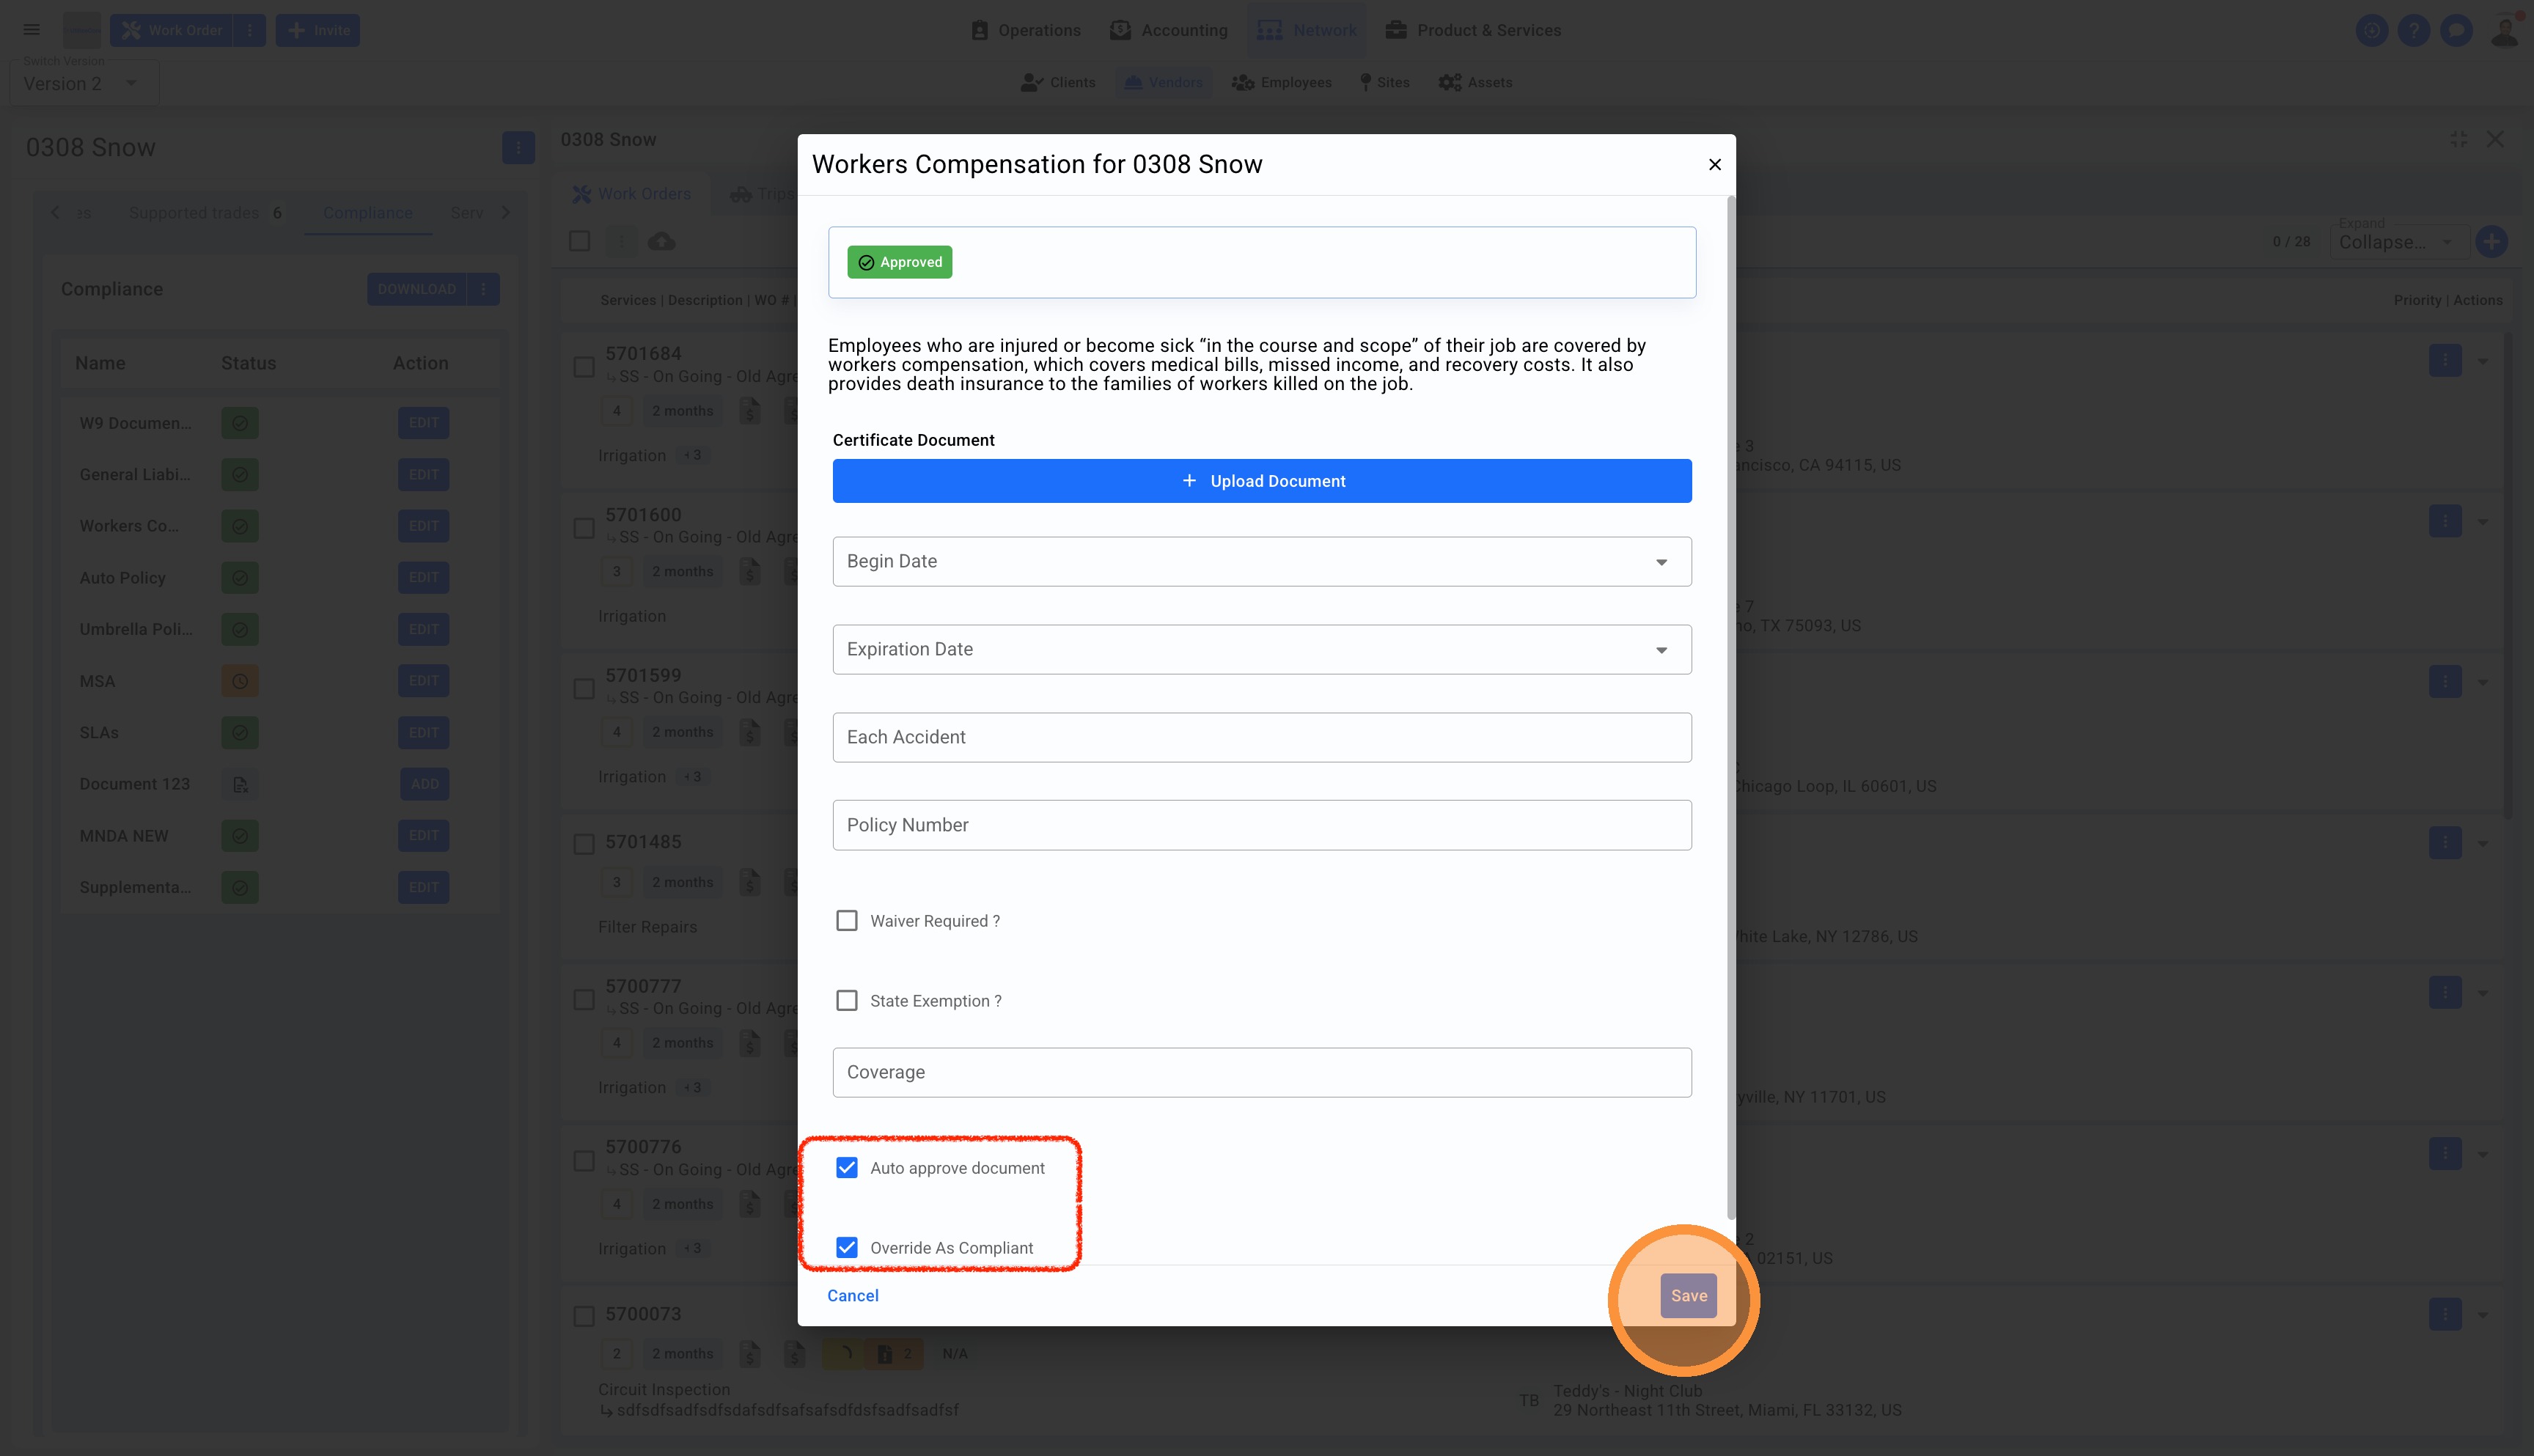
4. You'll see two checkboxes in the bottom of every compliance document.
- Auto Approve Document: This means as soon as you upload the document and Save, the document will be auto approved. You don't have to manually approve/accept it like the step above
- Override As Compliant: This checkbox will override company settings and conditions you've set up for Compliances in your Company Setting