How To Create a New Priority in Company Settings
You can customize the priority types, and set default start, end, and expiration times for work orders.
1. Click on the menu icon on the top left corner

2. Select "Settings"

3. Expand "General Details" under Work Orders

4. Expand "Configurable Fields"

5. Click "Edit" on the Priority Types row

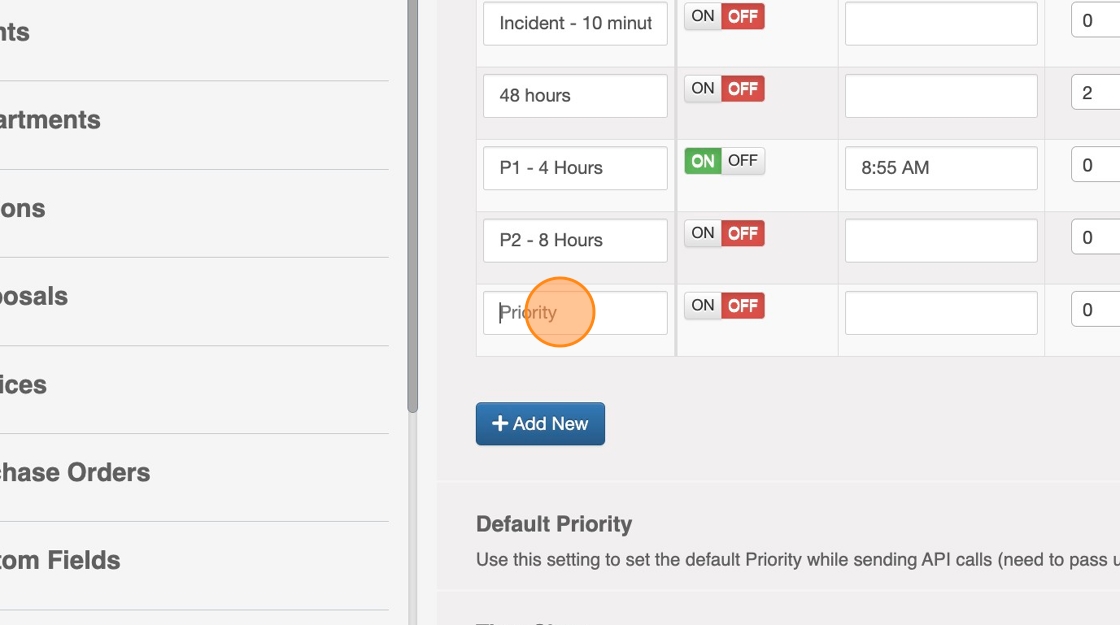
6. Click "Add New"

7. A new row will be added on the above list and you can start adding your Priority Name in the first field

8. Turn the switch "ON" and enter a Time in the next field. Every time this Priority is selected while creating a new Work Order the Priority Start will be calculated based on the time you put in this field.
Note: You can keep this switch "off" in case you don't want this feature.

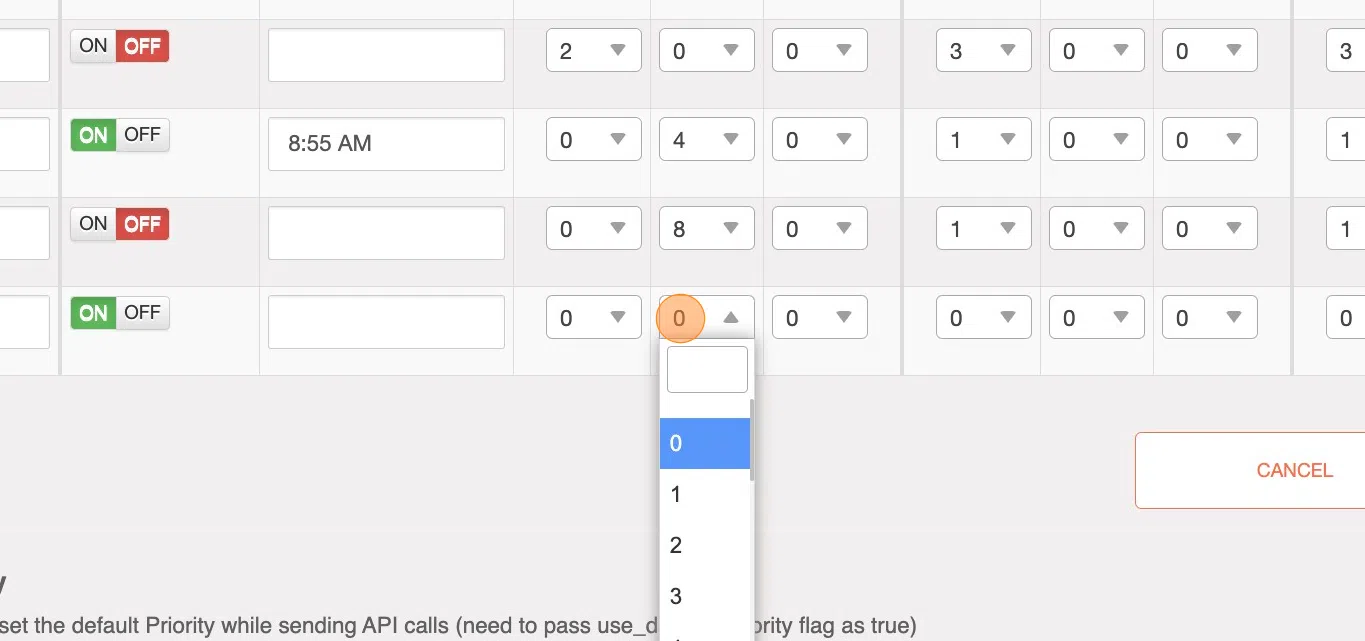
9. Enter a Default Start - Days or Hours or Minutes. Whatever input you put here will be the WO ETA from the time of creation.
For instance, if you create a new Work Order at 9:00 a.m. EST and the Priority Default Start is set to 2 Hours, the Work Order ETA will be 11:00 a.m. EST.

10. Enter a Default End - Days or Hours or Minutes. Whatever input you put here will be the WO ETC (Estimated Time of Completion) from the time of creation.
For instance, if you create a new Work Order at 9:00 a.m. EST and the Priority Default Start is set to 5 Hours, the Work Order ETC will be 02:00 p.m. EST.

11. Enter a Default Expiration - Days or Hours or Minutes. Whatever input you put here will be the WO "Trip Close" from the time of creation.
For instance, if you create a new Work Order at 9:00 a.m. EST and the Priority Default Start is set to 5 Hours, the Work Order Trip Close will be 02:00 p.m. EST. This means the Work Order will no longer be available on your tech's mobile app after 02:00 p.m. EST

12. Select the "Active" checkbox to activate and make your newly added Priority available to your Team Members

13. Click "Save"

14. Your newly added Priority will be visible at the time of creating a new Work Order

