1. Click "Product & Services"

2. Click "Services"

3. Click on the Trade row

4. This should expand and give you a list of all Services under the Trade. Click on the pencil/edit icon for the Service on the right

5. You should see a pop-up. Scroll down and click on "Custom Forms"

6. From there another pop-up should allow you to "Add New Custom Forms"

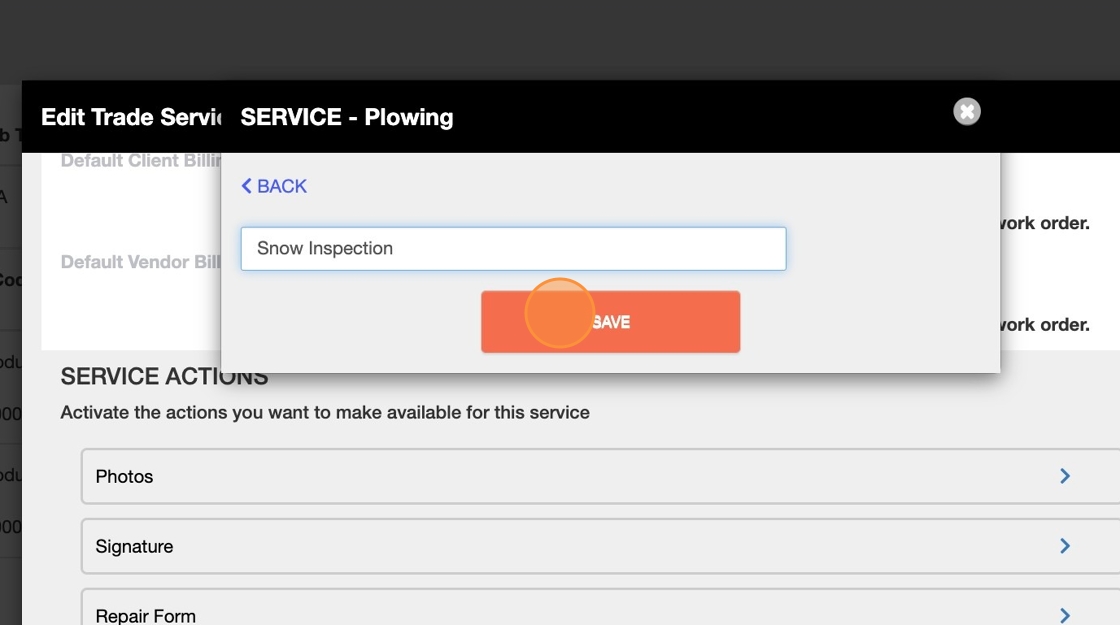
7. Enter your Custom Form Name

8. Click Save to create a new Custom Form
9. Click on the switch to turn it on. Unless you turn this form on, it will not be visible to your technicians on the field
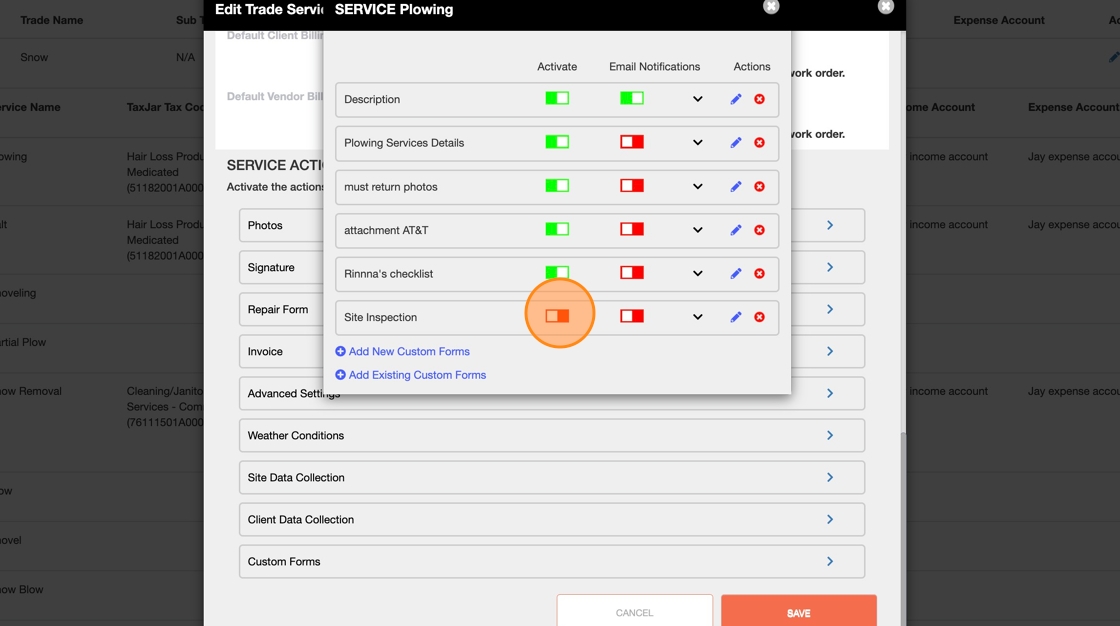
10. Click on the pencil/edit icon to add your Custom Form attributes/fields such as description, photos, signature, date picket etc.

11. To add a description field click on "Add Long Text Field"

12. Enter the description box name

13. Click on the orange button "UPDATE"

14. You can also allow photos in this field box

15. You can give options to your technicians by clicking on "Add Drop Down"

16. Enter the dropdown name to allow your technicians to select from multiple options
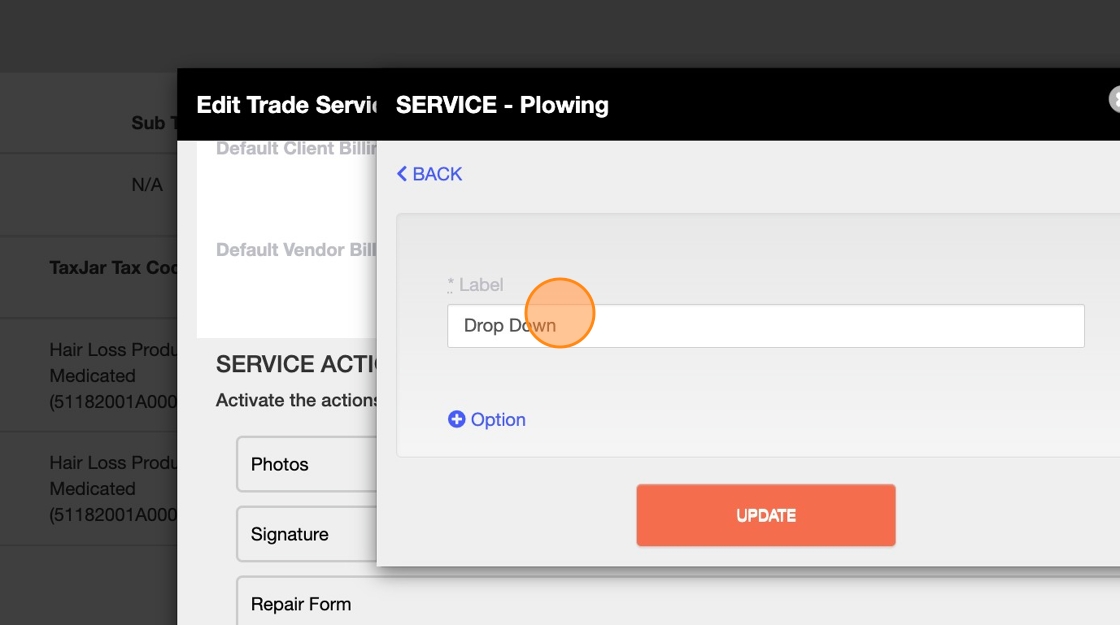
17. Click on "+ Option" to add your choices

18. Click on "UPDATE" after adding choices/options

19. You can allow pictures by turning on the switch for Photos

20. To allow technicians to add pictures in your Custom Form click on "Add Photo Capture"

21. Enter a label

22. Enter a number for minimum photo capture

23. Click "UPDATE" to save

24. You can also allow your technicians to upload a signature. Scroll down and click on "Add Signature"

25. Enter a Signature label name and click on "UPDATE"

26. Scroll up and click on "SAVE" to save your Custom Form attirtubutes

27. Your newly added Custom Form should be visible in the list

28. You can turn on email notification every time this Custom Form is submitted by your technician on the field.

29. Click on your Team Members name in the box to the left and they'll move over to the right box. Team Members in the right box are the email recipients

30. Scroll down and click on "SAVE"

31. Click this arrow to minimize email recipients screen

32. Close this pop-up to go the previous pop-up and Save changes

33. Scroll down and click on Save. This is a very important step in order to save your Custom Form

34. You should see a success message upon successful completion. You can close this modal pop-up by clicking on the "x" icon
