How To Create a New Client From Newer Version
This guide provides step-by-step instructions on how to create a new client in a network. It covers everything from entering client details and contact information to adding sites and scheduling services. By following this guide, users can easily create and manage clients in their network.
1. Click on Network on the top center menu, select Clients from the sub-menu. Click on the round plus button on the right to add a new Client

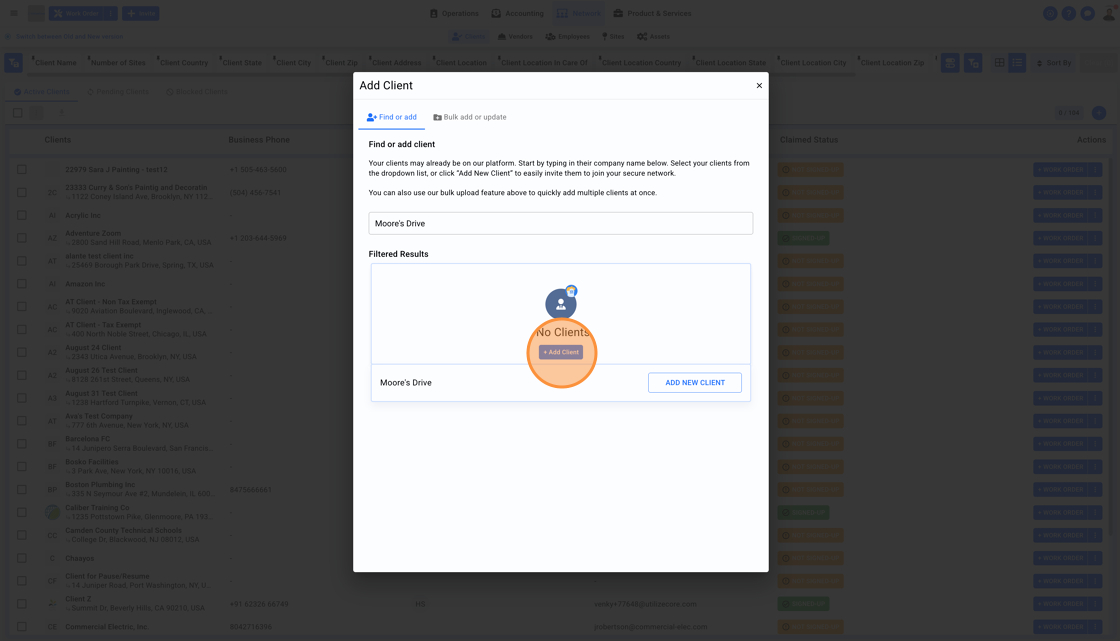
2. Enter the Client's name in the field. If they exist in UtilizeCore you can add them to your Network by selecting their existing profile. If the Client doesn't exist in UtilizeCore you can click on the blue button + Add Client

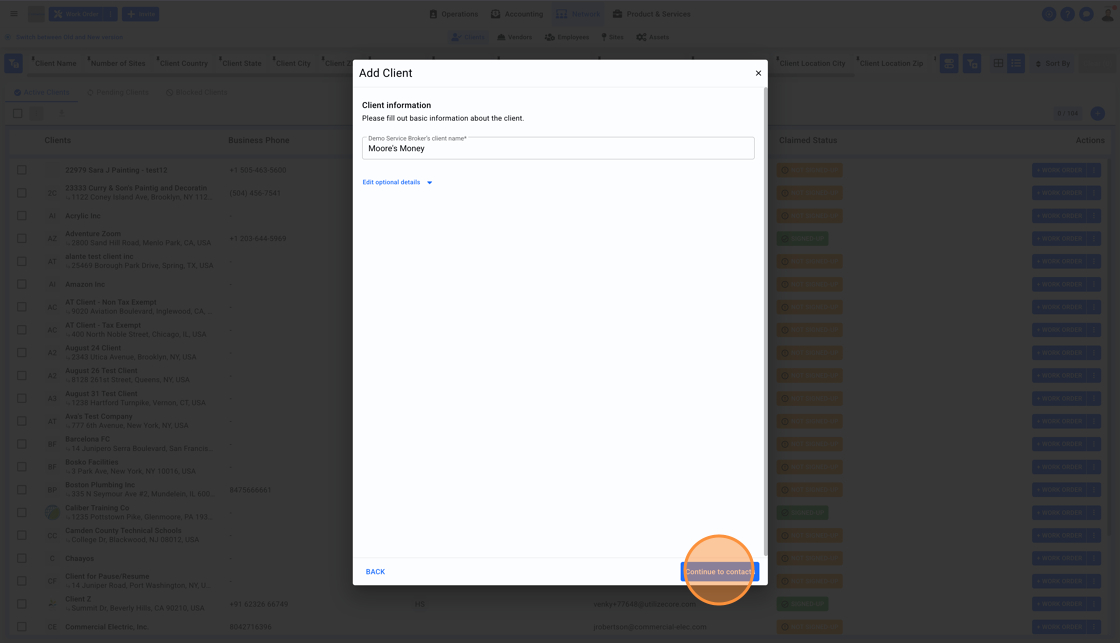
3. Click on the blue button Continue to contacts

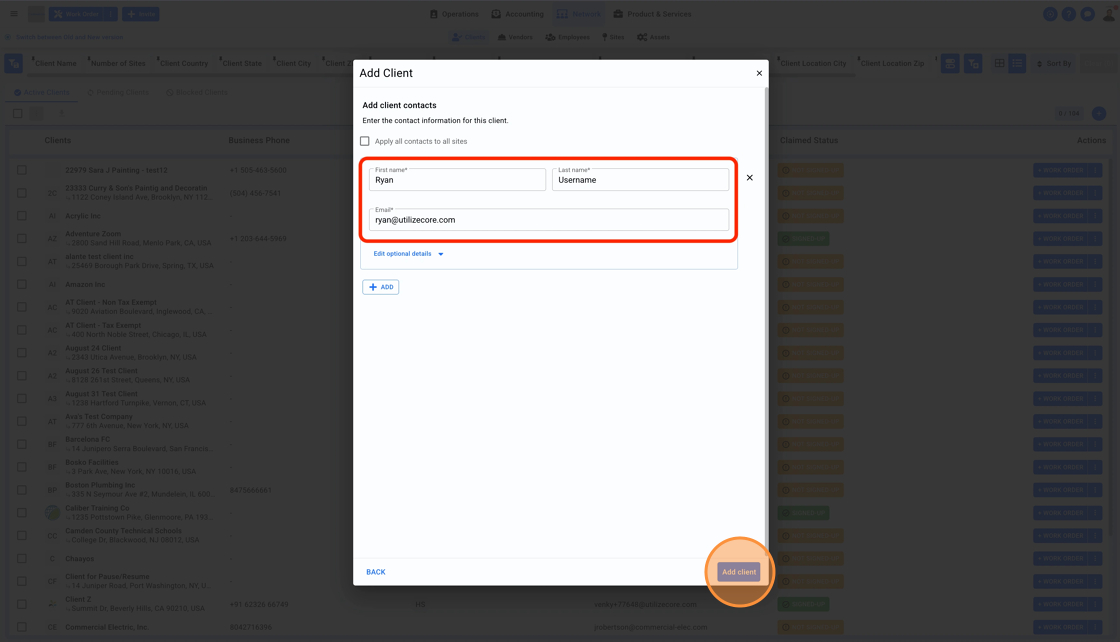
4. Enter the Client's contact name and their email. Click on the blue button Add Client

